2022: Week 31 - Solution
Solution by Tom Prowse and you can download the workflow here.

Step 1 - Liquid Products


Step 2 - Top 10 Sales
Now we have a cleaned table, we can start to aggregate and then find the top 10 sales for each Product Size, Scent and Store combination.
First we need to aggregate to calculate the total sales (Sum Sales in aggregation) for each Size, Scent and Store (group by these in the aggregation):

From here we can then rank our sales from highest to lowest using the analytical calculation. In this setup we want to rank the Size and Scent combinations for each Store, therefore we can group by Store and rank the Sale Value from Highest to Lowest:

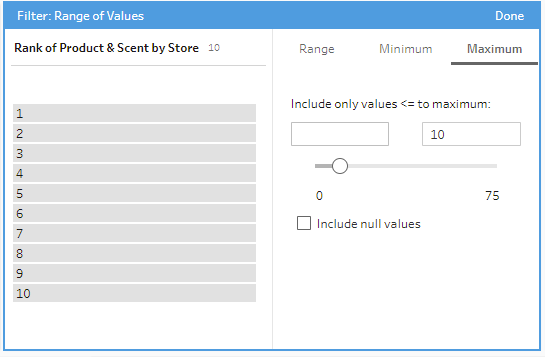
Now we have the ranks, we only want to keep the Top 10 for each Store. Therefore we can use a filter to remove the rest:
Then the last step is to round the sales value to the nearest 10 using this calculation:
Sale Value
Step 3 - Selecting Stores
The final part of this challenge is setting up a parameter so that the user can select a Store when the workflow is run. In Tableau Prep you can create a parameter by selecting the from the top toolbar:

From here you will need to give your parameter a name (and a description if you're feeling nice!), select String, then List in allowable values.

Next we then want to fill in the list with all of the different Store names that we want to be selected. Unfortunately, this is still a manual process in Prep (unlike Desktop where you can fill based on a field), so we'll need to type in each of our Stores. Make sure you're careful with spelling, as if there are any differences then it won't be picked up in our workflow later!
The completed parameter should look like this:

Now we have created the parameter, we need to go and use it in our workflow. In our case, we want to use it in a filter to keep only the selected store. Luckily, we can use parameters in calculations, so we can filter by calculation where Store Name = Store Parameter.

Notice the colours of the fields - Orange is the field in the table, Purple is the parameter that we created.
This calculations allows us to Keep Only the selected value, therefore when we update the parameter the selected values should then change.
For example, when Notting Hill is selected:

Then final step for the challenge this week is to use the parameter to rename the output based on the selection. Within the Output step we can also use parameters within the name, so can give it a normal name and then add the parameter at the end:

Our output will depend on what Store is selected when we run the workflow, but it should have the following structure:


